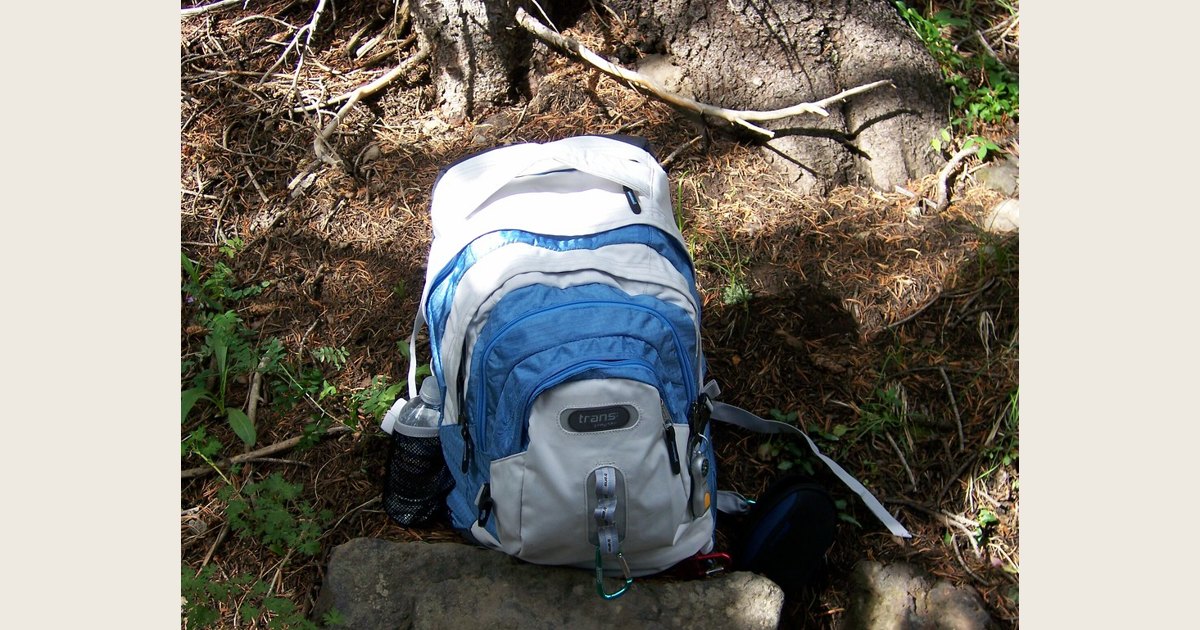
Featured image caption: A hiking backpack rests on the ground outdoors.
Featured image credit: Photo: hiking backpack by andrew.petro, https://www.flickr.com/photos/14362628@N00/207756390; https://creativecommons.org/licenses/by/2.0/. Resized and padded. Illustrative stock photo; no product testing is implied.
A men’s hiking backpack should fit your torso and hips first, then match the amount of gear you actually carry. Start by measuring torso length, compare that number with the pack’s stated torso range, and make sure the hip belt wraps securely around the top of your hip bones. Then test the pack with a realistic load—not just empty in a store.
The “men’s” label can be a useful place to start browsing, but it is not proof that a pack will fit. A comfortable choice keeps the load stable, lets the hip belt do its job without slipping, and leaves the shoulder straps as supportive contact points rather than the sole place carrying the weight. For a broader overview of volume and pack categories, see our guide to choosing a hiking backpack.
Quick fit check
- Match your measured torso length and hip-belt range to the pack’s sizing guidance.
- Set the hip belt first, then adjust the shoulder straps and load lifters; keep the sternum strap loose enough for comfortable breathing.
- Test with a realistic load, then balance and secure the gear.
Start with torso length, not standing height
Two people of the same height can need different backpack sizes. Torso length is the useful starting measurement because it helps you compare your body with a pack’s harness range.
Gregory’s official fitting guide describes measuring from C7 down the spine to the iliac center, aligned with the highest point of the hip bones. Its method provides this starting example; confirm the instructions for your own pack:
- Tilt your head forward and find the prominent bump where the neck meets the upper back (the C7 vertebra).
- Put your hands on your hips with thumbs pointing toward your spine. The line across the top of the hip bones is the lower reference point.
- Measure from C7 down the spine to that line.
Write down the result and compare it with the specific pack’s fit chart and published harness range. Do not infer a size from standing height alone. Gregory recommends a loaded try-on with at least 10–20 pounds; follow the specific pack maker’s directions for load and adjustment, and compare size options with weight if your measurement falls at a boundary or the fit remains uncertain. Gregory’s guide provides its size chart and loaded try-on instructions.
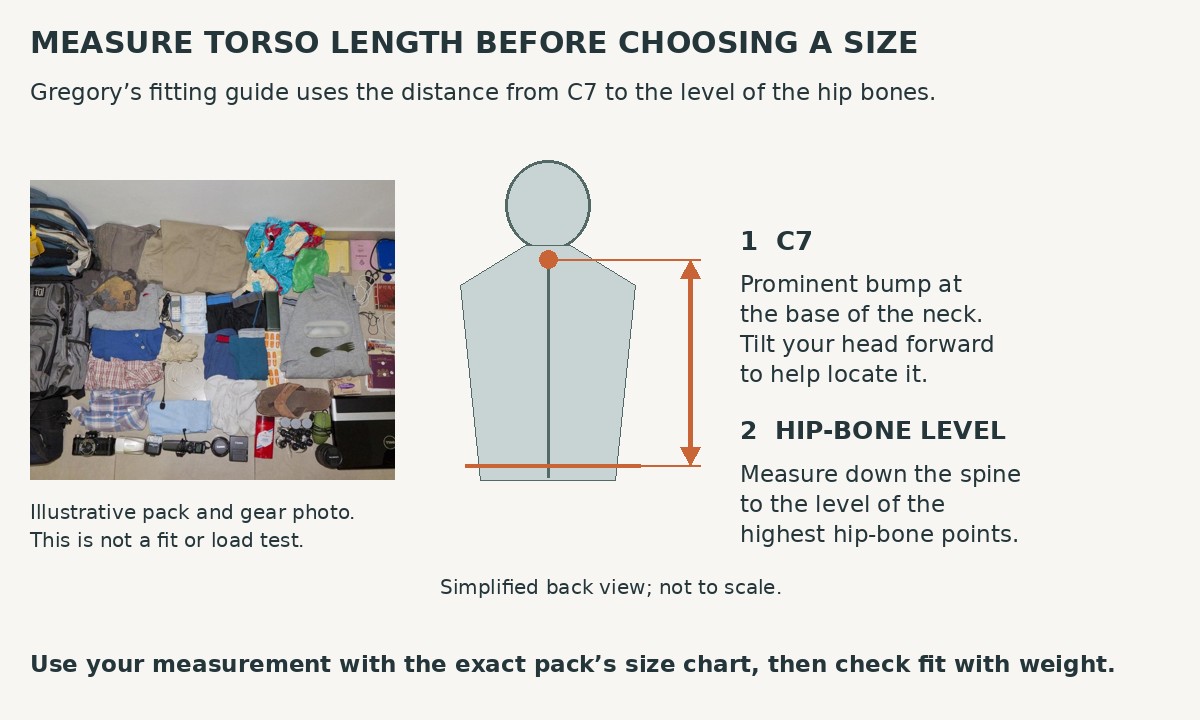
Use this back-view diagram to locate the approximate start (C7) and end (highest point of the hip bones) of the torso measurement, then measure along the spine and check your pack’s fit chart. It follows Gregory’s measurement guidance; confirm the exact method for your model.
Diagram and annotations: Pack and Pocket, following Gregory’s torso-measurement guidance. Photo: Backpack Contents for 188 days by Nestor’s Blurrylife, https://www.flickr.com/photos/7711906@N07/6192964557; https://creativecommons.org/licenses/by/2.0/. Photo cropped and combined with original annotations. Illustrative gear photograph; no product or load testing is implied.
Treat “men’s fit” as a starting filter
Men’s hiking backpacks often use a men’s size run or a particular harness and hip-belt shape. That can narrow the search, especially when the listed torso range and belt range are a close match. It should not replace a fit check.
Avoid buying from assumptions about height, body type, or a gendered product name. Instead, evaluate these four points:
- Torso range: Is your measured torso length covered?
- Hip-belt range: Does the belt tighten securely over your hip bones without maxing out or leaving too much overlap?
- Shoulder-harness contact: Do the straps follow the shoulders and upper back without pinching your neck or floating far above the shoulders?
- Comfort with load: Does the pack stay composed when you walk, bend, and step up?
A shopper whose measurements and comfort favor a different size run should choose the fit that works. The pack name is less important than a stable, adjustable connection to the body. For a related fit discussion, see our guide to women’s hiking backpacks.
Fit the hip belt before the shoulder straps
Set the hip belt using the placement instructions for the pack before adjusting the rest of its harness. As a specific example, Gregory advises positioning the top edge of its hip belt about 1 inch above the hips. Follow the exact model’s guidance rather than a universal belt-height rule.
Buckle the belt and tighten it firmly enough that it does not drift down while walking. It should feel supportive, not painfully constricting. Check both sides: a belt that is nearly out of adjustment before it feels secure is likely the wrong belt range, even if the torso length is right.
With the belt set, use this adjustment order:
- Hip belt: Establish the pack’s position on the hips.
- Shoulder straps: Snug them until they make even contact. Do not crank them down to haul the pack upward off the hips.
- Load lifters: Adjust the small straps near the top of the shoulders so the pack is brought in toward your upper back without feeling cinched over the shoulders.
- Hip-belt stabilizers: If present, snug these to reduce movement at the sides of the belt.
- Sternum strap: Clip it and adjust lightly enough to keep the shoulder straps positioned without restricting your breathing.
This order follows the American Hiking Society’s pack-adjustment guidance: hip belt first, followed by shoulder straps and load lifters, then hip-belt stabilizers. The organization also says the sternum strap should remain loose enough for free breathing. Read the complete adjustment and packing sequence from the American Hiking Society.
A broad, padded harness can improve comfort, but padding cannot make a badly sized pack fit. The American Academy of Orthopaedic Surgeons includes two wide, padded straps and keeping a backpack close to the back in its backpack-safety guidance. That source is focused on children and teenagers carrying school backpacks, so it is best used here as a narrow ergonomic reminder rather than adult hiking-pack test data. See the AAOS guidance and its context.
Match capacity and suspension to the trip
Fit and suspension work together. A pack that feels fine for a short day hike may be a poor match for a multiday kit, while a large pack is unnecessary if it remains mostly empty. The American Hiking Society notes that day hikes and multiday trips have different capacity needs and starts its packing advice with choosing a pack that fits well and is adequate for the hike. Its guide explains the trip-length distinction.
When comparing candidates, think about what you carry most often:
- Short day hikes: Prioritize a close, secure fit and enough room for water, food, layers, navigation, and emergency items.
- Long days or variable weather: Look for enough usable space to avoid strapping loose gear everywhere, while still checking that the packed bag can be compressed and stabilized.
- Overnight or multiday hikes: Compare the pack’s torso and belt fit with the bulk of your shelter, sleep system, food, water, and layers. Load the candidate with comparable weight before deciding.
Suspension is not a magic feature list. A more structured pack can be worth considering when you expect a bulkier or heavier setup, but its benefits disappear if the belt slips or the torso length is wrong. Conversely, a lighter, simpler pack can be an excellent choice for a compact kit as long as it remains stable at your expected load.
Pack dense items close to your back and higher in the pack, balance weight from side to side, and cinch external items tightly. Those are specific recommendations from the American Hiking Society to reduce an uneven or swaying load. Follow its packing guidance before judging a pack’s stability.
Diagnose common fit problems before replacing the pack
Most discomfort points to either adjustment, packing, or a basic size mismatch. Load the pack as you would for a hike, walk for several minutes, then make one change at a time.
Shoulder pressure or numb hands
First, loosen the shoulder straps slightly and reset the hip belt over the hip bones. If shoulder pressure returns immediately, the torso length, hip-belt range, or loaded packing setup may be wrong. A pack that requires very tight shoulder straps to stay put is not transferring support effectively through the belt. Persistent pain, tingling, or numbness warrants stopping the test and seeking individualized fitting or medical guidance as appropriate.
Hip belt slips downward
Start by moving it back onto the top of the hip bones and tightening it evenly. Next, compress the load and bring dense gear close to the back. If it still slides with a realistic load, check whether the belt is too large, too small, or exhausted its adjustment range. Do not solve a slipping belt by overtightening the shoulder straps; that often shifts discomfort upward. Our step-by-step guide to using and adjusting a hiking backpack covers the full adjustment process.
A gap behind the shoulders or a pack that rides too high
A gap is a reason to revisit fit, not proof of one particular fault. Gregory’s guide calls for a smooth shoulder-strap wrap onto the back, starting about 3 inches below the top of the shoulders; it suggests trying a smaller size if that starting point is lower. Those are Gregory’s fitting cues. Use your own pack’s harness directions and compare sizes with weight rather than diagnosing the cause from a gap alone.
Load sway or a lopsided feeling
Repack before blaming the suspension. Balance left and right sides, keep dense gear close to the back, tighten side compression, and secure any external item. The American Hiking Society specifically cautions against uneven side-to-side distribution and loosely secured external items that can sway. Use its loading checklist for the final check.
A practical buying checklist
Before committing to a men’s hiking backpack, confirm all of the following:
- Your measured torso length is inside the stated pack or harness range.
- The hip belt fits over the hip bones and still has useful adjustment in both directions.
- You can set the shoulder straps snugly without relying on them to carry the whole load.
- The sternum strap sits comfortably and does not limit breathing.
- The capacity suits the longest trip and bulkiest kit you realistically expect to carry.
- With a representative load, the pack stays close, balanced, and quiet while you walk.
The right men’s hiking backpack is the one that fits your torso, hip belt, and planned load. Measure first, test under weight, and use the adjustment sequence every time you change the load. Those steps will tell you more than a product label or an empty-pack try-on ever can.